Dealing with Sore Muscles

IMG_3017

The best thing you can do is stretch

Oh boy! I just finished my first class in a few weeks and I am hurtin’! It was a really strange circumstance of me leaving my studio just in time for the new studio to be closed for two weeks, then I was out of town. So It had been three weeks of no structured class. I have been stretching and trying to practice at home as much as possible but I think that there is definitely something to be said for the rigor of a structured class. I got to class a bit early to stretch and speak with the instructor and thought I was ready for anything- I couldn’t have been more wrong! Haha. It still surprises me, adjusting to my body as an adult and how it works, to see how just a little break in activity can send me right back to square one (okay maybe like square five, but still not where I was at!). I got home a sweaty mess, plopped down on the bed, and told my fiancé that I know I need to eat but I’m not sure how to go about it because 1. I can’t move my legs and 2. I’m nervous that the second I put food into my mouth I might throw up. Ok, I’m slightly dramatic but I really was whooped! I knew that I instantly needed to get on top of making sure my muscles don’t tighten up much because I knew if I didn’t I probably would be in a world of hurt tomorrow. I thought I’d share a few of my tips for avoiding that next day of crying when you drop your keys because you know how much it will hurt to pick them back up. 😉

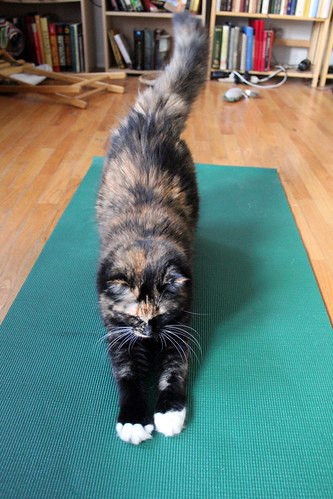
1. Stretch it out: I like to lay on my back on the floor, stick my leg straight up at a 90 degree angle and just make slow circles of varying sizes with it. The slow motion really makes you stretch it out. Then I bring my leg straight over across my body for a while, bend it for a while, then I bring my knee to my chest. I also like to borrow some yoga moves like these here. I particularly love doing the cat, cow, child, and half downward dog because they feel so relaxing but they also really do stretch those muscles out. The key is to keep stretching throughout the day so that the lactic acid doesn’t settle in your muscles which is what makes you sore. It seems like the most obvious tip but I also think that it’s the first we forget.

2. Soak! I love a good, warm Lush Bath Bomb (or essential oil) and epsom salt bath. I find the that the combination of heat and scent take the epsom salt to the next level because you’re not just relaxing your muscles but your mind too. Personally, I get super stressed from being so busy and having a stressed mind leads to a tense body and there’s no amount of salt that can take that away. So lock the bathroom door, tell the kids or partner that you’re out of commission for 20 minutes and relax! I also enjoy partaking in a good foot soak, perfect for a dancer. I love trying new “recipes” that I find on pinterest. Today I tried one with green tea, baking soda, vinegar and epsom salt. The result wasn’t too pretty… the water, well it looked a little gross. However, my feet felt AMAZING after.

3. Enlist a loved one for a massage! This is self-explanatory and can be fun!

4. Fuel your body properly. This one is hard. There are so many different resources with conflicting ideas about what to eat in general, but when you add in what to eat for working out there are one thousand more ideas. What I have found that has really worked for my body is to have a protein AND carb heavy snack about an hour before I go to ballet. Something like bagel with peanut butter or hummus. Occasionally I throw an apple in as well. I also make sure to follow my class up with a balanced yet protein and fresh food heavy meal or snack. For example, today I had a burrito in a whole wheat tortilla with eggs inside, lots of lettuce, carrots, avocado, and cabbage. I feel that I almost always feel so much better when I have something that is substantial but not heavy. I’ve read in a few places that blueberries (or any antioxidant heavy food) work well because they soak up all the free radicals left. Anti-inflammatory foods like kelp, salmon, ginger, green tea,  and sweet potatoes are also supposed to be really helpful in telling your muscles to calm the heck down. And, of course, stay hydrated!

5. Try some topical treatments like white flower oil, icy hot, peppermint oil, or salonpas. My personal favorite when it comes to this is to, right after my hot bath, rub a little white flower oil diluted in baby oil all over my legs, bottom, back, arms, and shoulders and then bundle up in warm clothes for a while. This really lets it soak into my muscles and feels SO nice.

6. Finally, don’t be too afraid of the occasional ibuprofen or Tylenol. Sometimes the pain is just too much to manage with home remedies and that’s totally fine. You don’t have to do without!

Hopefully some of these tips are helpful/new to at least one person. What do you do to keep the aches and pains away?

-Caysie

Calf Stretches for Ballet and Running

This one applies to you runner’s out there too: calf stretches. Both ballet and running cause me to get horribly tight calves and shin splints, but they’re getting slightly more manageable. Here’s some of my favorites:

Downward-facing cat

Downward facing cat

 Downward Facing Dog:

Arms should be shoulder width apart, legs hip width apart, balancing your legs equally. Knees can be bent if you’re a beginner. I like to alternate between keeping one knee straight and the other bent to feel a full stretch.

Runner’s Stretch:

This one’s really popular. Stand at a wall with your hands placed straight in front of you, with one leg bent in a lunge and the other extended behind you. Sometimes I have to bend my back knee ever so slightly to get a good stretch in this one as well ( I have hyper-extended knees).

 Wall or stair stretch:

I don’t have any stairs in my apartment, so I often do this one just on a wall or on the foot of a ballet barre if I’m in class. Stand by a wall with one foot pressed up again the wall at an angle; or stretch one heel down off a stair while the other remains of the step.

Towel Stretch:

The same basic stretch you used to do in high school gym class with some help. Sitting on the floor, extend both legs out straight in front of you and wrap a towel or theraband around your feet and pull yourself down to your toes. While I can reach my toes, I like the extra stability this gives me. Another variation is to start by gripping the towel with a straight back and then lean back slightly to stretch the calves.

Foam Rolling:

The foam roller is my frenemy. It hurts but also helps so much. For calf tightness I like to roll both by shins and my calves. I roll my shins both at the same time which is pretty easy; I roll my calves individually by holding myself up with my arms with one leg crossed over the other.

I know there are lot more great stretches out there, so let’s hear them! What are your favorite ways to stretch out your calves?

Taking It on the Road: Ballet Away from Home

Hotel room stock photo

This past year, I’ve had occasion to do a lot of travel. Most of it has been business, some has been personal, and all of it has presented me with a challenge if I want to practice ballet. A handy chair or railing can substitute for a barre, but you probably don’t want to do grand jetes in the hotel corridors.

Here are a few solutions I’ve found to the “Where can I dance?” problem:

1. Local Dance Studio: If you have transportation, Google the area ahead of time. Don’t be discouraged if the only thing you can find is a studio that requires students to sign up in semester-long blocks of classes. Sometimes you can get permission to join a class on a drop-in basis.

2. Local Gym: Some memberships give you access to facilities in other cities, and most gyms offer day passes. Even if a gym doesn’t have a dance studio, you can often make use of a fitness room when there isn’t a class. If you want something more private, consider appropriating a racquetball court. Gyms often have several of these and they make great private spaces for floor work.

3. Hotel: This one is hit and miss, but here are a few things to try:

• Your Room: If you are in a suite, you may be able to move the sitting room furniture out of the way and dance in the privacy of your own room.

• Pools and Exercise Rooms: Some hotels have a separate area of the fitness center for yoga and aerobics classes. Be sure to also check out the pool. Many hotels have a poolside area for small functions. You should not dance on bare concrete, but a thin carpet with low nap will often work just fine.

• Ballrooms/Conference Rooms: Sometimes you can find an unlocked door to a ballroom or conference room. If it hasn’t been set up with too many tables and chairs, you’ve got yourself a dance studio. If all the rooms are locked, explain your situation to the front desk. They have heard stranger requests than yours and may be happy to help.

A Few Considerations:

1. Scheduling: If you are angling for an empty conference room, your best chance of success will be weekday evenings and weekend mornings, so plan accordingly. This may mean skipping the drinks and heavy hors d’oeuvres at a conference reception, or skipping a reception altogether and meeting a few colleagues for dinner and drinks after your dance practice.

2. Music: If you don’t like dancing while wearing earbuds, consider buying a speaker for your mp3 player. I use the iHome 3.5 mm portable speaker, but there are many options out there.

3. Shoes: Unless you have made arrangements to attend a ballet class, leave the pointe shoes at home. You don’t know what kind of floor surface you’ll be on, and you don’t want to spend your vacation or conference covered in bruises and nursing a sprained ankle. Bring several different types of ballet slippers if you can. The shoes that are your go-to at home might be too slippery or too grabby for the dance space you find. You might even have to dance barefoot or in socks.

In sum, dance practice is very doable while away from home, but requires creativity and flexibility. Luckily, this is what ballet is all about. Just remember to get outside and see a few sights while you’re away, too. Have a few adventures, because when you get home the last thing your non-ballerina friends will want to hear about is your perfect pirouette by the hotel pool.

DIY Barre–ballerinas can build too!

Before: giant pile of pipes and wood. After: beautiful ballet barre that matches my decor. Yippee!


I’m really excited for this post today because the project in it has changed my life. (A little dramatic, maybe, but you get the idea!) It has been so nice to be able to have a barre at home to practice my port de bras, tendus, pliés, etc. when I don’t really have time to go to a full class. I had been using my door frames and kitchen counter to balance previously and let me tell you- not so graceful looking! I had seen some Instagram posts of people using portable barres so I looked online to see where to buy one and was not super excited about price. I got to scouting for other solutions and found this lovely tutorial by Laughing Abi and I thought I’d give it a shot. As to not be horribly boring and repetitive, I’ll leave the step by step out and summarize the process and also include the little changes I made to my barre from the tutorial.

Here’s what you’ll need to replicate my barre:

  • Six 1 1/4 inch PVC cross joints
  • Four 1 1/4 inch PVC elbow joints
  •  Two  30 inch long 1 1/4 inch PVC  pipes (I made my barre at 43 inches because I’m tall. In order to change the height of the top barre, adjust the lengths of PVC that are 30 inches.)
  • Two 6 inch long 1 1/4 inch PVC pipes
  • Four 12 inch long 1 1/4 inch PVC pipes
  • Two closet rods or wooden dowels between 1 1/8 inches and 1 1/4 inches in diameter… these should be around 6 feet long in the store.
  • 8 screws
  • Spray paint (I used Valspar Perfect Finish Gloss in “Tropical Oasis”)
  • PVC glue (I used Christy’s Red Hot Blue Glue)

What you’ll want to do is assemble the 2 of the 12 inch pieces together with a cross in the center and an elbow on each end. Repeat for the other side. I glued all of those joints together for extra sturdiness. It’s optional but if you choose to do it, make sure you work fast because that glue dries in a heartbeat! From there stick the long pieces (mine were 30 inches) into the cross you just attached the 12 inch pieces to. You’ll then add a cross to the end of that. Repeat for the other side. Now you can slide in your first barre! Now insert the 6 inch pieces into the top cross joints. Add the final cross joints to the tops of those and now slide in your first barre. This is where I took mine apart again to paint it. After the paint was dry I put the barres back in where I wanted them and instead of using foam as suggested on the tutorial, I screwed through the cross joints into the wooden barre. This was my dad’s suggestion to help the whole thing from wobbling side to side. I did a screw on each side of the cross joints (8 total). I then carefully sprayed those teal as well. That’s more or less it! It was simple, sorta fun, and fast. I think I managed to finish the entire project in under two hours which isn’t bad for something I get so much use out of.

In progress.


Overall, I’m pretty pleased. It made practicing at home a lot easier. It also has come in handy for stretching! I must say, because of how lightweight it is it isn’t super sturdy. This means that you can’t really put much weight on it, it’s really only good for adding some balance to what you are doing. In the end, that’s really what a barre is for anyway so it is helpful not only to help you keep balanced but also to remind you not to use the barre to hold you up. Make that supporting leg do some work! 🙂 I also added a big piece of cardboard left over from when we had some bark delivered for our landscaping in order to keep my shoes from getting scuffed on the flooring. It also comes in handy for practicing in the bedroom, where we have carpet. The combo has become my own little studio that all tucks behind my dresser when I’m not using it which is perfect for how small our place is.

Using my barre for pliés and stretching in my kitchen which is right across from a full length mirror.

So there you have it! An easy, affordable, and portable ballet barre that you can make yourself. I honestly am glad that I made it. If you decide to give it a whirl, let me know how it works out! Do you have any other suggestions for ballet at home?

-Caysie

How Running Taught Me The Importance of Stretching

longi0.jpg

Yeah…I can’t do this. (Photo credit: Wikipedia)


Ballet requires stretching. You need to be flexible. But as a busy college student, the want to be flexible and get my splits just wasn’t motivation enough. If I had actually started stretching regularly when I started I’d probably be there by now–but I haven’t. I developed challenges and plans and even tried yoga–but it didn’t work. I would only occasionally stretch.


Things have changed now that I’m running. In order get my calves into tip-top condition, I’m stretching them everyday and after every run. My foam roller is also seeing more use than ever. As my hips get tighter, I keep stretching them out more and more as well. Although my body is probably overall ending up tighter than before I was running, I feel like I’m getting somewhere as I incorporate stretching into my routine because for the first time in a while I feel like I HAVE to stretch or my body is just going to be ridiculously tight. So maybe running isn’t such a horrible thing for dancers after all.


How do you stay motivated to keep stretching?