Should We Change Our Name?

I’ve been debating a name change recently, for a few reasons:

  • I went for an interview once and someone told me when they read the name they thought it was pornographic….
  • E-mails I send from my domain aren’t getting responses/are possibly going into spam.
  • I get spam related to the “adult” in the name.

It’d be a fairly cheap (money-wise) change over, and I’d be able to redirect people who type in the old address. So I want to know–do you like the name, or is it kind of lame?

If you have any suggestions for possible new names,   I’d love to hear them.
Stretching Series: Stretching Tips and The Back

In my previous posts, as well as on the Adult Ballerina Project Facebook,  I mentioned that I would be doing a post on stretching. I got some good requests and feedback on what type of stretches you’d like to see and I decided that rather than squeeze it all into a horrible 5 page long post or a short one without pictures that I’d do a series instead. So this will be the first of my stretching series and I’m starting with my favorite part of the body to stretch: The back!

83eb6bb7f3e5113d03859d2cf0cfcc79Before we begin with that, I’d like to give some of my general tips on stretching.

1. Bundle up. Ok, this may sound really unpleasant. Especially because it’s summer. But this has been a huge help in increasing my flexibility. When I stretch I typically wear tights, legwarmers, shorts, sweatpants, a leotard, and a sweater. As I heat up, I strip layers but I tend to leave my legwarmers and shorts on to keep my legs and hips nice and toasty. One word of caution if you do decide that this tip is something you’d like to try… don’t overdo it. Make sure you’re hydrated and that you’re not pouring sweat. It should serve to help get and keep your muscles warm, not to make you pass out from heat stroke.

2. Warm up for your warm up. This may sound silly but when I stretch I like to walk around the room fast for a few minutes, do a few jumping jacks, or something similar. Getting your blood flowing just a little bit will help your muscles warm up and be more flexible.

3. Use Therabands to help add some resistance or to help you grab your leg when your arms cant quite reach yet.

4. Make good use of fences, counters, doorways, couches. I love to stretch my legs out by just resting one on my counter like its a barre. When I’m at hotels I use the door frame to help me stretch my back out. Be creative and use whatever is safe that you can use to help aid you in stretching.

5. Don’t push yourself too far. Stretch just enough for a little discomfort and hold for 15 seconds. Then next time hold for 20, then 30 and so on. When it becomes “easy”, then push yourself a little farther and repeat the process. This will keep you from torn muscles.

6. If you’re having a stiff day, stretch after a warm bath.

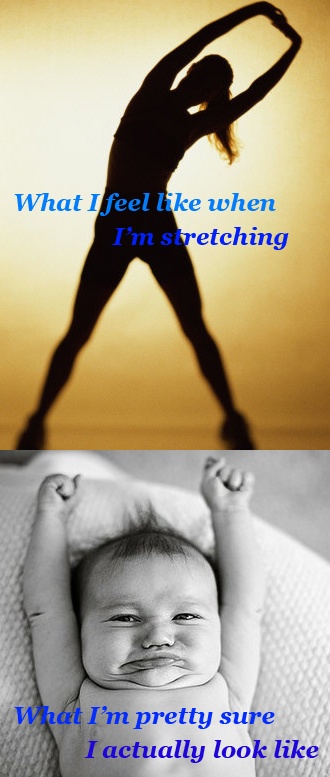
7. You might not look like the hot babes in the yoga pictures you found online- and that’s ok! I get annoyed with this all the time. I imagine myself doing a stretch I see online and when I do it it looks TOTALLY different (and much less cute) than the pictures I saw. But lets get real- that’s what the person in the picture does for a living and they usually have also sat through hair and makeup (and get touched up) and are taking a full day to take like five pictures. Stretching isn’t about the visual product as much as it is making sure that your body is flexible and ready for dancin’.

Ok so now I’ll start with my favorite back stretches. I do these almost daily, if not twice daily. I have found that my posture has totally changed with these stretches and that my arabesque and port de bras have also improved as well.

back2


1. (Left to right) I start with a cobra pose focusing on keeping my shoulders down and pushing up with my sternum rather than my lower back.

2. Once I’ve reached that pose and have held it for about 30 seconds or longer, I bring my feet up as close to my head as I can get them. It’s ok if you can’t get them to your head yet, just keep trying by bringing them up as high as you can.

3. I always like to reverse my stretches. When I stretch one muscle group, I stretch the opposing muscle group. I find that this helps me avoid soreness and keeps me from having any part of my body from being more flexible one way than the other. Soooo, to reverse these back stretches I do a cat pose, remembering to pull up from the back as well as pushing up from the core.

back


4. From there I turn over and do a back bend, feet and hands flat on the floor. After holding as long as you’re able between 15 and 30 seconds.

5. Slowly go down onto your elbows one at a time. I like to put my hands together in the center but you can also put them parallel to each other on the ground. Start by staying on flat feet and holding for a few seconds, then go up on demi pointe. Hold.

6. Walk your feet outward as far as you can to see if you can straighten your legs. I’m still unable to straighten completely but I’m getting there. I find that the easiest way to get out of this pose is to just keep sliding until you’re laying on your back.

7. Last I like to lay on my back and sort of just wiggle around, loosening everything back up. It seems super counter intuitive that stretching would make you tight, right? But I’ve noticed that sometimes with back stretches, your back wants to revert back to it’s previous happy place right away after you’ve pushed it so I just roll out my back, twist around, and try to loosen it back up before I go about my business. 

This is also a great video that can be really helpful. Click here.

What stretches do you do to increase your back flexibility/strength? Also, what parts of the body do you want to see stretches for in this series? (I know that we got one request for knee stretching and I will be certain to get that done!)

Happy Stretching!

**Keep in mind, these are just MY favorite stretches and you definitely need to make sure are careful trying anything new.

Beginner Ballet Tips: Sewing Elastic to Ballet Slippers

Roughly one year and one month ago, I picked up my first pair of ballet slippers at one of the local dance stores in Philadelphia and was told I needed to sew the elastics myself. Nothing more. I was clueless. I searched online and was frustrated with every article and how-to telling me how to sew pointe shoe ribbons and elastics. I eventually found this video and sewed on my elastics the best I could:

Looking back at those shoes, my elastics were sewn kind of terribly (not because the technique in the video is bad, but just because I’m horrible at sewing). I wish I had found these tips by Adult Beginner and Dave Tries Ballet to help me out when I needed it. Adult Beginner uses a single elastic, so if that’s what you’ve got, go check her’s out. The video, Dave Tries Ballet, and my tutorial below deals with criss-cross elastics that are already sewn at the back-end. I wear Sansha split sole canvas shoes (I’m looking into trying more, I just bought these because I needed new shoes and knew these would fit if I ordered them online).

Here’s what you’ll need:

Shoes

Pen or Permanent Marker

Scissors

Safety Pins

Needle and Thread (I recommend Bunhead’s Stitch Kit if you don’t already have needles and thread lying around. It’s super thick, strong thread that will make sure the elastics will stay put both on pointe shoes and ballet slippers)

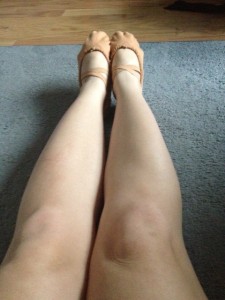
My elastics are pulled tight so that my shoes fit my feet.

Step 1. Tighten the elastic strings at the top of your ballet slipper until you get a nice fit. You don’t want them strangling your foot but you don’t want the shoes to be falling off either.

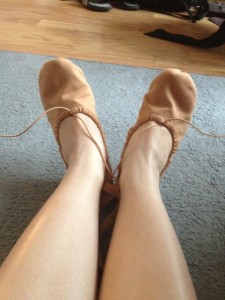
Step 2. Mark where you will sew the elastics with permanent marker at your arches by stretching them over your feet–I just sew mine to the middle seam in my slipper. Again, you want them to be holding your foot in but not too tight. I sew the elastic from the inside of the foot underneath and the one that comes in from the outside over (I’m pretty sure there’s no rules written in stone about this–I just know it’s mentioned in one of the videos I watched so that’s what I do). I then mark each slipper somewhere on the inside so I can quickly know which one is left and right without having to look super carefully at the elastic.

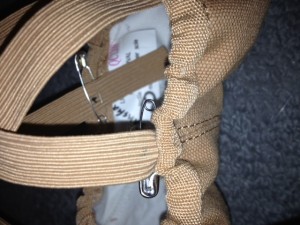
Step 3. Secure the elastic using a safety pin where you will sew them and try them on again, making sure that you’ve got the right fit. Point and flex your feet a couple of times.

Step 4: Cut the elastics if you need to so they fit into the shoe (I usually leave about 1/2 an inch from the very top part of the shoe so there’s enough to sew securely in). You could probably burn the elastics to make sure they don’t fray but I don’t find it necessary.

I can’t really give you any advice on doing the actual sewing part since I’m a novice at it–some people hand sew, others use a machine. Whichever method you choose, make sure you don’t sew into the elastic string that goes around the shoe by accident.

Step 5: Put your shoes on and check the elastic string for tightness again, making sure you’ve got it where you want it. Some people will leave their strings long and tie them in a bow and then tuck them in (they shouldn’t be left out so your foot doesn’t get dragged over them and/or so you don’t trip on them).Having all the loose strings shoved into my shoe drives me crazy, so I double knot mine (without tying a bow), cut them pretty short, and then burn the ends.

Step 6: Put them on, check for the correct fit (one last time!) and admire a job well done!

What do you wish you would’ve known before starting ballet classes?

PS If you’ve got any tips for how you attach your elastics to ballet slippers, let me know! This is still a work in progress for me!

Don’t forget—#adultballerinas twitter chat!

Twitter chat will be at 930 pm EST! Feel free to comment below with your twitter name so other people can follow you before we start!

Mine is @kristengillette.

Well be using #adultballerinas with every tweet if you want to follow along.