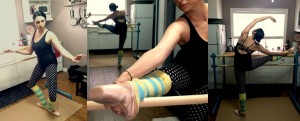
Taking It on the Road: Ballet Away from Home

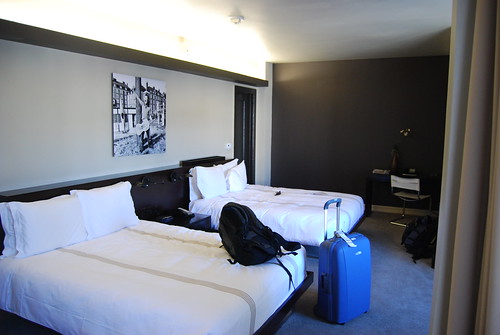
Hotel room stock photo

This past year, I’ve had occasion to do a lot of travel. Most of it has been business, some has been personal, and all of it has presented me with a challenge if I want to practice ballet. A handy chair or railing can substitute for a barre, but you probably don’t want to do grand jetes in the hotel corridors.

Here are a few solutions I’ve found to the “Where can I dance?” problem:

1. Local Dance Studio: If you have transportation, Google the area ahead of time. Don’t be discouraged if the only thing you can find is a studio that requires students to sign up in semester-long blocks of classes. Sometimes you can get permission to join a class on a drop-in basis.

2. Local Gym: Some memberships give you access to facilities in other cities, and most gyms offer day passes. Even if a gym doesn’t have a dance studio, you can often make use of a fitness room when there isn’t a class. If you want something more private, consider appropriating a racquetball court. Gyms often have several of these and they make great private spaces for floor work.

3. Hotel: This one is hit and miss, but here are a few things to try:

• Your Room: If you are in a suite, you may be able to move the sitting room furniture out of the way and dance in the privacy of your own room.

• Pools and Exercise Rooms: Some hotels have a separate area of the fitness center for yoga and aerobics classes. Be sure to also check out the pool. Many hotels have a poolside area for small functions. You should not dance on bare concrete, but a thin carpet with low nap will often work just fine.

• Ballrooms/Conference Rooms: Sometimes you can find an unlocked door to a ballroom or conference room. If it hasn’t been set up with too many tables and chairs, you’ve got yourself a dance studio. If all the rooms are locked, explain your situation to the front desk. They have heard stranger requests than yours and may be happy to help.

A Few Considerations:

1. Scheduling: If you are angling for an empty conference room, your best chance of success will be weekday evenings and weekend mornings, so plan accordingly. This may mean skipping the drinks and heavy hors d’oeuvres at a conference reception, or skipping a reception altogether and meeting a few colleagues for dinner and drinks after your dance practice.

2. Music: If you don’t like dancing while wearing earbuds, consider buying a speaker for your mp3 player. I use the iHome 3.5 mm portable speaker, but there are many options out there.

3. Shoes: Unless you have made arrangements to attend a ballet class, leave the pointe shoes at home. You don’t know what kind of floor surface you’ll be on, and you don’t want to spend your vacation or conference covered in bruises and nursing a sprained ankle. Bring several different types of ballet slippers if you can. The shoes that are your go-to at home might be too slippery or too grabby for the dance space you find. You might even have to dance barefoot or in socks.

In sum, dance practice is very doable while away from home, but requires creativity and flexibility. Luckily, this is what ballet is all about. Just remember to get outside and see a few sights while you’re away, too. Have a few adventures, because when you get home the last thing your non-ballerina friends will want to hear about is your perfect pirouette by the hotel pool.
DIY Barre–ballerinas can build too!

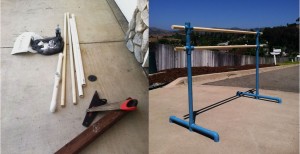
Before: giant pile of pipes and wood. After: beautiful ballet barre that matches my decor. Yippee!


I’m really excited for this post today because the project in it has changed my life. (A little dramatic, maybe, but you get the idea!) It has been so nice to be able to have a barre at home to practice my port de bras, tendus, pliés, etc. when I don’t really have time to go to a full class. I had been using my door frames and kitchen counter to balance previously and let me tell you- not so graceful looking! I had seen some Instagram posts of people using portable barres so I looked online to see where to buy one and was not super excited about price. I got to scouting for other solutions and found this lovely tutorial by Laughing Abi and I thought I’d give it a shot. As to not be horribly boring and repetitive, I’ll leave the step by step out and summarize the process and also include the little changes I made to my barre from the tutorial.

Here’s what you’ll need to replicate my barre:

  • Six 1 1/4 inch PVC cross joints
  • Four 1 1/4 inch PVC elbow joints
  •  Two  30 inch long 1 1/4 inch PVC  pipes (I made my barre at 43 inches because I’m tall. In order to change the height of the top barre, adjust the lengths of PVC that are 30 inches.)
  • Two 6 inch long 1 1/4 inch PVC pipes
  • Four 12 inch long 1 1/4 inch PVC pipes
  • Two closet rods or wooden dowels between 1 1/8 inches and 1 1/4 inches in diameter… these should be around 6 feet long in the store.
  • 8 screws
  • Spray paint (I used Valspar Perfect Finish Gloss in “Tropical Oasis”)
  • PVC glue (I used Christy’s Red Hot Blue Glue)

What you’ll want to do is assemble the 2 of the 12 inch pieces together with a cross in the center and an elbow on each end. Repeat for the other side. I glued all of those joints together for extra sturdiness. It’s optional but if you choose to do it, make sure you work fast because that glue dries in a heartbeat! From there stick the long pieces (mine were 30 inches) into the cross you just attached the 12 inch pieces to. You’ll then add a cross to the end of that. Repeat for the other side. Now you can slide in your first barre! Now insert the 6 inch pieces into the top cross joints. Add the final cross joints to the tops of those and now slide in your first barre. This is where I took mine apart again to paint it. After the paint was dry I put the barres back in where I wanted them and instead of using foam as suggested on the tutorial, I screwed through the cross joints into the wooden barre. This was my dad’s suggestion to help the whole thing from wobbling side to side. I did a screw on each side of the cross joints (8 total). I then carefully sprayed those teal as well. That’s more or less it! It was simple, sorta fun, and fast. I think I managed to finish the entire project in under two hours which isn’t bad for something I get so much use out of.

In progress.


Overall, I’m pretty pleased. It made practicing at home a lot easier. It also has come in handy for stretching! I must say, because of how lightweight it is it isn’t super sturdy. This means that you can’t really put much weight on it, it’s really only good for adding some balance to what you are doing. In the end, that’s really what a barre is for anyway so it is helpful not only to help you keep balanced but also to remind you not to use the barre to hold you up. Make that supporting leg do some work! 🙂 I also added a big piece of cardboard left over from when we had some bark delivered for our landscaping in order to keep my shoes from getting scuffed on the flooring. It also comes in handy for practicing in the bedroom, where we have carpet. The combo has become my own little studio that all tucks behind my dresser when I’m not using it which is perfect for how small our place is.

Using my barre for pliés and stretching in my kitchen which is right across from a full length mirror.

So there you have it! An easy, affordable, and portable ballet barre that you can make yourself. I honestly am glad that I made it. If you decide to give it a whirl, let me know how it works out! Do you have any other suggestions for ballet at home?

-Caysie

How Running Taught Me The Importance of Stretching

longi0.jpg

Yeah…I can’t do this. (Photo credit: Wikipedia)


Ballet requires stretching. You need to be flexible. But as a busy college student, the want to be flexible and get my splits just wasn’t motivation enough. If I had actually started stretching regularly when I started I’d probably be there by now–but I haven’t. I developed challenges and plans and even tried yoga–but it didn’t work. I would only occasionally stretch.


Things have changed now that I’m running. In order get my calves into tip-top condition, I’m stretching them everyday and after every run. My foam roller is also seeing more use than ever. As my hips get tighter, I keep stretching them out more and more as well. Although my body is probably overall ending up tighter than before I was running, I feel like I’m getting somewhere as I incorporate stretching into my routine because for the first time in a while I feel like I HAVE to stretch or my body is just going to be ridiculously tight. So maybe running isn’t such a horrible thing for dancers after all.


How do you stay motivated to keep stretching?


Guest Post: Finding the Right Studio

Caysie face pictureUnfortunately over the week I seem to have developed a bit of a chest cold that prevented me from going to dance (among other things). What’s with this summer cold business?? Anywho, I was hoping to post a nice tutorial blog with photos of a DIY stand alone barre that I made before I started feeling unwell but because I am not up to setting up to do the pics for that post, it will have to wait until next week. Why even tell you, you ask? Perhaps then maybe you’ll be motivated to check back because that DIY barre is a life saver for a busy lady like myself who just wants a 20 minute tendu sesh here and there. Now that I’ve dangled that like a carrot in front of your face (mwahaha), I’ll get on to my post for this week which is a bit inspired by the lovely Queen Michelle at Kingdom of Style, but a more beginner focused version.

I’m currently in the process of switching studios because the one I currently go to is so far away. I figured that since finding a studio/class and going to the first class is a huge hurdle for a lot of adults who want to begin ballet but haven’t yet I’d write about that process. I’ll address some of the most important concerns I first had myself.

1. I’m going to look like an idiot. Ok. So this fear of mine really was the absolute biggest I had that stopped me from starting up a class.  It’s hard to start something if you have little to no experience with it. You can be nervous that people will laugh at you or that you’ll be the center of attention cause you can seem to EVER get into first position. I have tested the waters with a few classes and can tell you, from personal experience, that this is 95% of the time not the case. Adult beginner classes are just that- BEGINNER. Even if you don’t know a plié from a piqué, it’s unlikely that anyone will judge you for it. You’re there to learn and build these skills just like everyone else. From my experience it’s just been an hour of laughing and commiserating because no one is perfect! We all have our “looking silly” moments, and you know what… it’s ok that it’s funny because it’s fun!

2. I have no idea what studio is the best fit. This one has the easiest solution: try them all! Many studios offer the first class for free or allow you to come watch for free. If you’re concerned with fit of the style of class and the instructor, it’s always a very good idea to check it out. Sometimes you’ll love it, sometimes you won’t but HEY! it was a free ballet class and that never sucks!

3. I’m nervous about the other people in the class being WAY better than me, judging me, or being cliquey. This one is a little similar to the first but not quite the same. This was a big concern for me for my first few classes. I’d arrive early, sitting in the lobby stretching and no one would talk to me. It was a weird feeling to be on the outside. I’d look around and see some women in their 40’s talking about their daughters’ recitals and having a hard time stretching. Then I’d see a 16 year old who could not possibly be in my class (just look at her with her perfect ballet bun in the front splits reading a school book!). Then I see a 60 year old woman with her leg stretched over her head in the corner. I am like absolutely none of these ladies. How on earth do I belong here?! Let me tell you how we ALL belong here- we love ballet. After class begins each time, any sort of social barrier gets left at the door and we all have a great time focusing on our technique, stretching together, and joking around. Moral of this story is: you may meet some friends at ballet, but if you don’t that is OK too. You’re there for dance and in the end that is what will unite you!

4. I don’t have time! This is something that I still struggle with when it comes to ballet. I find myself tempted after a busy week and when I know that I have lots of homework to skip ballet (whether at home, using a video, or in a studio). We’re all busy but it’s really important to make time to take care of your mind and body and ballet is great for me to do both. I fought myself for hours last week whether or not I was going to go to class. I was grumpy the whole way there. But about 10 minutes into class, I forgot about being busy and just enjoyed moving. So, if ballet is for you then make time! Even if its just 30 minutes at home or an hour of class a week. On occasion if I’m particularly busy or if I’m traveling, I just squeeze in a 15 min Ballet Beautiful workout along with some stretching.

Hopefully that covers some of the fears some of you may be having about starting a ballet class or about being in one. If there are any other things you can think of, I’d love to hear them in the comments and we can talk about them as well! I’d also love to hear any ideas about what you’d like to hear about from the beginner perspective, I’m open to it all! Again I apologize for the lack luster post due to my being sick, but I promise I’ll make it up to you with that DIY barre post when I’m better.

Any advice on overpronation?

Ballet shoes, showing the dancer's feet in fif...

 (Photo credit: Wikipedia)

Overpronation is when your feet roll inwards too much towards the big toe side of the foot. It happens a lot when dancers try to “fake” their turnout using their knees and ankles instead of their hips (guilty here). It was brought to my attention last class that I should instead be trying to distribute my weight equally among my toes and place it more back on my pink toes as well (people in this dance.net forum recommend the same thing.) I tried to maintain this throughout class, but it was tough–and I feel like the rest of my technique suffered and my arches were crazy sore throughout class. Sigh.

My overpronation is probably the cause of all my ballet-related shin splints which have been really bad as of late and haven’t been much motivation for me to get to ballet class. Since getting new sneakers and running more often, my running shin splints have been reduced to almost nothing (almost).

I know that overpronation can be created by forcing turnout (you can try it and see for yourself) but I also know I overpronate when I stand “naturally”–which I figured was caused by the fact I am one of the most flat-footed people ever–especially since new sneakers have helped. So I took to the Internet to try to get more of a solution…and pretty much came up with a variety of different explanations…and no real answer.

Some say that overpronation is purely a technical problem (sure, I can correct it, but it’s still how I naturally stand and feel like I have for a while). Others say it’s caused by being flat-footed. Others, ankle weakness.  A lot of websites recommended orthotics (which won’t work with ballet) others say if it’s not caused by flat feet, that’s not a solution. My head is spinning.

Advice anyone? I’d appreciate help whether you know about overpronating in runners or dancers.